 Now that I have a lovely new workroom to work in I have been making some little boxes for Christmas. I have done these before but thought that I'd make some more and share the method again as they are so useful for putting little things in and also I really enjoy making them! I hope you do too!
 Start by cutting a square of fabric and adding bondaweb to it. Then place the fabric over some paper and bondaweb to the paper. Cut off waste. You should cut 1 x *1/4 plus 1 x *. The size is up to you but one of the squares must be 1/4inch bigger to make the lid. A 6 inch square makes a small 2" box.

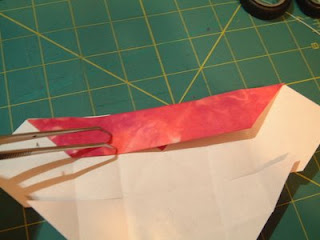
 Fold the corners in to the centre to make a marked square. Then fold up the corners to the first crease as shown above.
  Cut up to the middle square on opposite sides of the fabric as shown above. Fold the uncut sides in once and then again. Do this on both sides.
 Cut a square of fabric or card and push into the bottom of the box shape. Do this for both bottom and top. A dab of glue will hold them in place.
Now for the fun part. Decorate the top of the box with glitter glue and add beads, buttons, ribbon etc. Go to town!
I'm going into Truro tomorrow to buy some small gifties to put into them. I've seem some cute small chocolate Christmas puddings which will be just the thing for folk at work!


Love the boxes, I am putting that link into my to do file!
ReplyDelete